Discovering damp spots in your home can be a stressful experience for any property owner. If you are wondering how do you use a moisture meter to protect your investment, you have come to the right place for answers. These devices are essential for identifying moisture levels that are not visible to the naked human eye. Accurate readings allow you to address leaks before they turn into expensive structural repairs or hazardous mold infestations. In cases where early signs of contamination appear, professional mold remediation services can help eliminate hidden risks and restore a healthy indoor environment.
Accurate readings allow you to address leaks before they turn into expensive structural repairs or hazardous mold infestations. Whether you are dealing with a recent flood or a suspected slow leak, knowing how to operate your equipment is the first step toward a dry home. We will explore the technical nuances and practical applications of these vital tools.
Understanding the Basics of Moisture Detection
Before diving into the mechanical steps, it is important to understand the different types of technology available. Most modern devices offer various modes for testing different materials like wood, drywall, or concrete. Selecting the correct setting is the most critical part of ensuring your data is reliable and truly actionable.
A reading of 590 on a relative scale might indicate a severe saturation issue depending on the specific device calibration used. You must always check the user manual to see what various numerical values represent for your specific model. Understanding these baseline numbers helps you distinguish between normal ambient humidity and an active plumbing leak.
The Difference Between Pin and Pinless Meters
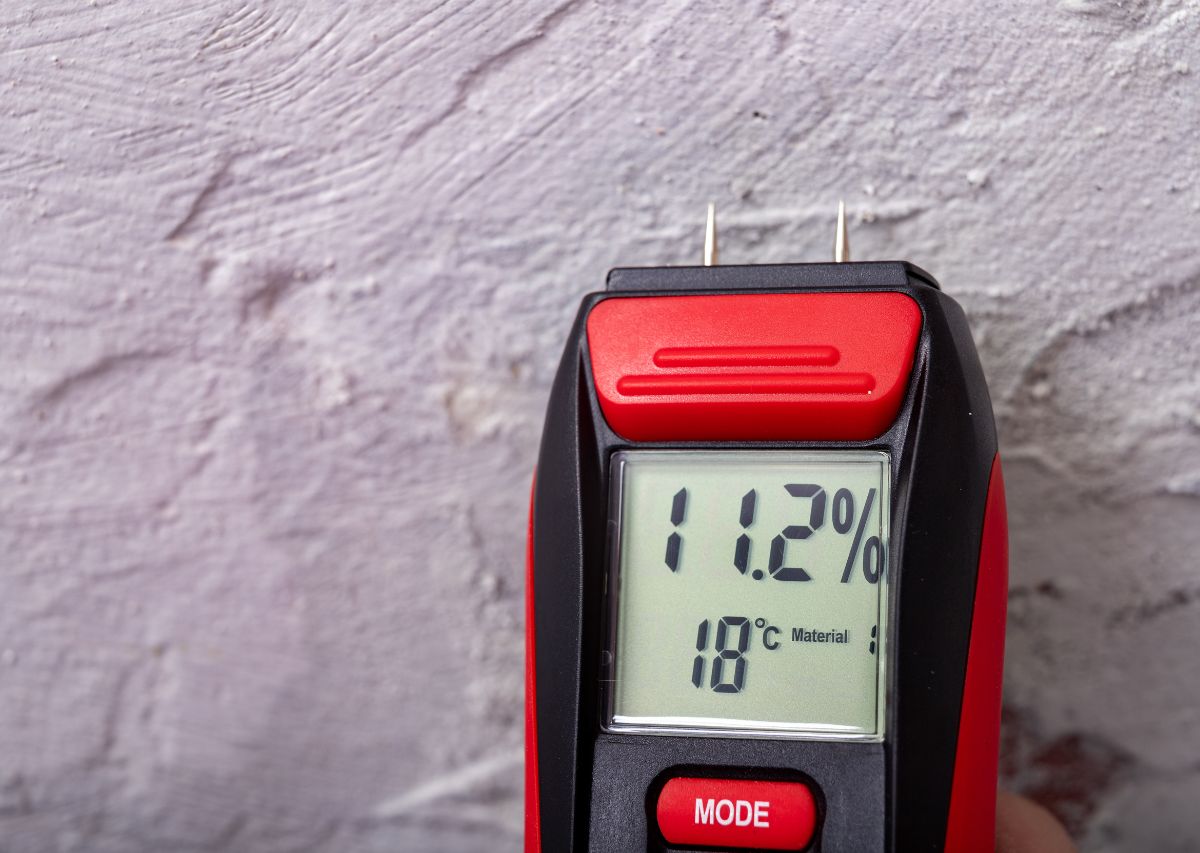
There are two primary styles of meters used in the restoration industry today. Pin-style meters require you to push two metal probes directly into the material you are testing. This physical contact allows the device to measure electrical resistance, which changes based on the amount of water present in the substrate.
Pinless meters use electromagnetic signals to scan larger areas without damaging the surface of your walls or floors. These are excellent for initial inspections where you want to cover a lot of ground quickly. However, they can sometimes be tricked by metal studs or wires hidden deep behind the finished drywall surface.
How Do You Use a Moisture Meter Step by Step
To begin your inspection, ensure the device is powered on and the battery is fully charged for accuracy. Press the sensor firmly against the material or insert the pins into the area where you suspect water is trapped. Hold the device steady for several seconds until the digital display stabilizes on a number.
Take multiple readings across a wide area to establish a clear pattern of where the water is moving. If you find a high reading, move the meter outward until the numbers return to a normal range. This process helps you map out the exact perimeter of the damage for the repair crew.
Calibrating Your Device for Accuracy
Many professional grade tools come with a built-in calibration check to ensure the sensors are functioning within factory specifications. You should perform this check every time you start a new inspection project. Environmental factors like extreme temperature or high humidity can sometimes influence the sensitivity of the internal electronic components.
If your meter allows for manual adjustments, set it to the specific species of wood or type of masonry. Incorrect settings often lead to false positives that cause unnecessary worry for homeowners. Taking a baseline reading on a known dry area of the house is a great way to verify your tool.
Common Mistakes to Avoid During Testing
One major error is failing to distinguish between surface moisture and deep saturation within the structure. If you only test the surface, you might miss water that has pooled behind the insulation or under the subfloor. Always try to get as close to the core of the material as possible for results.
Another mistake is ignoring the impact of salts or chemicals in the building materials. Certain types of treated lumber or old plaster can conduct electricity and mimic the presence of water. Cross referencing your findings with a thermal camera can help confirm if a high reading is actually caused by liquid.
Interpreting Your Results Effectively
Once you have collected your data, you need to understand what the numbers actually mean for your home. Most meters use a color coded system of green, yellow, and red to signify safety levels. A red light usually means the material is at risk for rot or fungal growth within 48 hours.
If you see a reading like 590 on a non-invasive scale, it suggests a significant moisture pocket exists. This data provides the evidence needed to justify opening a wall or filing an insurance claim. Precise documentation of these levels is key for any successful restoration project or long term property maintenance plan.
When to Call a Professional Restoration Team
While DIY tools are helpful, they often lack the depth of professional grade equipment used by experts. If you find consistent high readings that do not go away with fans, there is a deep seated problem. Professionals use advanced technology to find the source of the water that standard meters might miss entirely. In more severe situations involving biohazards or sensitive environments, specialized tragedy clean-up services ensure safe and compliant restoration.
Expert technicians can also provide a comprehensive drying plan that prevents secondary damage like sagging ceilings. They understand the science of psychrometry, which involves managing air flow, temperature, and humidity simultaneously. Attempting to dry a large scale flood without professional guidance often leads to recurring mold issues and structural failure.
Maintaining Your Moisture Meter
Keep your device in a protective case when it is not in use to prevent sensor damage. Dust and debris can interfere with the pins or the electromagnetic pad, leading to inconsistent or fluctuating readings. Periodically cleaning the contact points with a dry cloth will keep the tool in top working condition for years.
Replace the batteries frequently, as low voltage can cause the screen to fade or the sensors to lag. If you notice the pins are becoming dull or bent, replace them immediately to ensure they can penetrate hard surfaces. A well maintained tool is your best defense against the hidden dangers of unexpected water intrusion.
Important Safety Tips for Inspections
Always be cautious when probing walls near electrical outlets or hidden plumbing lines. Accidentally hitting a wire with metal pins can cause a dangerous shock or a short circuit in your home. Use pinless technology first to scan areas around utilities to ensure there are no obstructions before you start digging.
Wear protective gear if you suspect the water source is contaminated, such as a sewage backup. Moisture meters can become contaminated if they touch dirty water, so sanitize the probes after every single use. Staying safe is just as important as finding the leak when you are performing a detailed home moisture inspection.
Best Practices for Wood Floor Inspections
- Always test along the grain of the wood to get the most accurate electrical resistance reading possible.
- Check the subfloor from the crawlspace if possible to see if water is rising from below the boards.
- Take readings at different times of the day to see if temperature shifts affect the moisture content levels.
- Compare readings from the center of the room to the edges near the exterior walls for better context.
Essential Steps for Drywall Assessment
- Scan the bottom of the wall near the baseboards where water naturally pulls due to the force of gravity.
- Check for soft spots in the gypsum board while you are taking your digital moisture readings for confirmation.
- Look for staining or bubbling paint which often precedes a high reading on your moisture detection device.
- Move the meter in a grid pattern to ensure you do not miss a small pinhole leak in the plumbing.
Conclusion
Understanding how do you use a moisture meter gives you the power to protect your home from invisible threats. These tools are the first line of defense in maintaining a healthy, dry, and safe living environment for your family. By following the right procedures and interpreting data carefully, you can stop water damage in its tracks.
Never underestimate the importance of early detection when it comes to plumbing failures or roof leaks. A small investment in a quality meter and the knowledge to use it correctly can save you thousands of dollars. For extensive damage, relying on expert property restoration services ensures your home is fully restored and protected long-term. Keep your home dry, stay vigilant, and always trust the data when it points toward a potential moisture problem.
Professional Assistance for Your Property
Classic Disaster has built a legacy of trust through years of dedicated service to our local community. We offer comprehensive water mitigation, fire restoration, mold remediation, and professional moisture mapping services. Our team uses thermal imaging and industrial grade sensors to find every hidden drop of water in your structure. Let us help you navigate the drying process with the technical precision your home truly deserves.
Professional Solutions for Hidden Water Damage
Classic Disaster represents a heritage of excellence in property restoration. We provide total water mitigation, fire recovery, and mold remediation services for every client. Our technicians utilize high end thermal technology to identify saturated materials that standard tools miss. We ensure your structure returns to a safe and dry state with total accuracy. Let us provide the clarity you need to keep your property dry.
FAQs
To use a meter on wood, select the wood setting on your device first. If using pins, press them firmly into the grain of the timber. For pinless models, place the sensor flat against the surface. The device measures the water content percentage to help you determine if the wood is dry enough for use.
A normal reading depends entirely on the material being tested and the scale used. For wood, a range between five and twelve percent is typically considered dry. On a relative scale for drywall, anything below twenty percent is usually safe. Readings above these levels may indicate a leak or dampness.
A moisture meter does not detect mold spores directly but identifies the damp conditions where mold thrives. By finding areas with high moisture content, you can locate potential mold growth sites before they become visible. Using the tool helps you target the specific areas that require a deep inspection.
Set the meter to the drywall or masonry mode to ensure the internal calibration is correct. Place the sensor against the wall near the floor or suspected leak area. Move the device slowly across the surface to find the highest reading. This helps you map out the extent of the water spread accurately.
False readings can occur due to low batteries, metal objects behind the wall, or surface salt contamination. Extreme temperatures also affect the electronic sensors in some models. Always calibrate your tool and take multiple readings in different spots to confirm the data is consistent across the entire area.